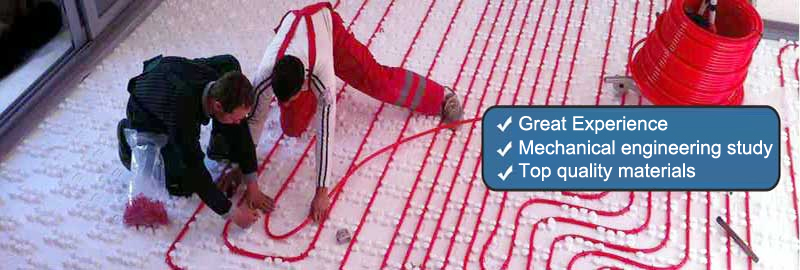
Underfloor heating is a heating method that increasingly has many supportes in Greece during the last years.
POUPALOS Bros. Co. constantly monitoring market developments and increasing customer demands for modern ways of heating undertakes the study and installation of underfloor heating for your constructions.
In addition, constructors who assign to us a great amount of electrical and plumbing installations benefit from further discounts to our existing competitive prices
With experienced crew using appropriate materials, we guarantee a technically sound application, which will be safe, functional and efficient, fully satisfying the heating needs of your home.To install an underfloor heating system we only use certified materials by REHAU and INTERPLAST exclusively designed for this purpose.


Preparing to install
Underfloor heating installation is quite different from other heating methods and directly affects the whole scheduling of the rest construction works. To proceed with the implementation of the study without problems many of the other works must have been completed.
Plastering. Plastering must have been completed, to enable our crew to work unaffected without any problems that might arise from parallel tasks.
Window and door frames.All external window frames must have been installed. Also, at the points where underfloor heating stops bricks or concrete should be placed(wardrobes, fireplaces etc).
Plumbing installations. All plumbing installations must have been completed, while special attention should be given to the installation of drainage floor waste traps.
Electrical installations. All internal electrical installations must have been completed while wiring associated with underfloor heating must have been checked that it is placed accurately.
Slab levelling and cleaning. In many cases there is variation in the slab construction so a levelling layer of cement should be poured to correct any deviations or bumps/projections coming from other works. Also all surfaces on which underfloor heating will be installed should be cleaned properly.
Installation
Installation of collectors.Installation begins with the placement of collectors in the distribution panels that have been placed in positions arranged by the study.
Installation of perimeter wall insulation. The perimeter wall insulation is placed between the wall and the castellated panels:
- along the inner side of exterior walls
- along all interior walls
- along all internal columns of heated areas not adjacent to walls.
Its purpose is to protect structural elements from the heated floor’s contractions and expansions.
Special joint section installation. After placing the perimeter wall insulation, our plumbers create expansion joints by placing special joint sections at predetermined points, selected during the study.
 Castellated panel installation. Our crew carefully places all castellated panel items starting from the corners of the heated areas.
Pipe installation. For pipe installation we select the meander shape pattern. This way, next to every water supply there is a water return ensuring uniform floor temperature, thus, consistent area temperature.The circuits’ lengths have been determined during the study based on areas heating needs and restrictions in relation to maximum acceptable pressure loss per pipe meter and maximum allowable surface temperature depending on space.Protection spirals are also placed at all points specified by the study.When laying of the circuits has been completed we thoroughly inspect the entire installation. Special attention is given at points where laying direction changes and at points where expansion joints have been placed.
Network testing
Network Testing. After the piping installation completion our technicians fill up the piping network with water from the collectors filling valves.After taking the air out from all circuits, we press/test the network by applying pressure three times higher from the expected operating pressure.Since no problem arises, we reduce network pressure to 60% and leave it at that level to proceed with the casting of cement screed overlay.
Cement screed casting. The overlay cement screed has unique characteristics and the materials proportion is specific.Our company has experienced crew that carries out this task responsibly, strictly following the relevant regulations to deliver to the next crew the final surface in perfect condition.
Cement screed drying. After puting the cement screed overlay we proceed with the drying process, which takes place in two stages.The first stage involves natural dehumidification during which we let the cement screed open/free for at least 21 days to discard humidity to the environment while we take care to protect the site from weather phenomena which could negatively affect the installation.In the second stage and after the boiler is complete we make all necessary arrangements to achieve artificial dehumidification which takes about 7-8 days.

